

How to erase a hard drive
It’s often said that our mobile phones contain our entire lives, but this sentiment could also be applied to our home computers.
Desktops and laptops aren’t just used for work, leisure and entertainment. They’re also designed to store personal information – and make it readily accessible.
From automatic logins and autofill data to unencrypted documents and internet histories, there’s a great deal of information we wouldn’t want a stranger to stumble upon.
Yet that’s exactly what could happen when we dispose of a computer without bothering to reset it to factory defaults or erase a hard drive.
As we’ll see below, simply deleting files from a hard drive doesn’t remove them.
And just imagine what a fraudster could do if they could view every credit card number, account password and financial form ever displayed on your computer…
Two tribes
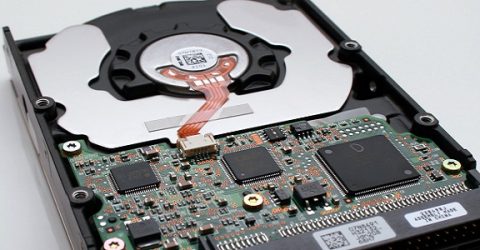
There are two types of hard disc drive – the traditional spinning HDDs found in most desktop computers, and the solid state drives (SSDs) used in laptops and tablets.
While the latter have to be formatted through the device’s operating system, HDDs can be physically destroyed.
Before attempting either course of action, it’s important to explain why erasing or destroying a storage device isn’t the same as simply deleting files and folders.
Deleting files generally leaves most of their contents behind, since it’s erasing each file’s title and location rather than overwriting every byte of stored information.
A file recovery program could easily reassemble ‘deleted’ files into something like their original guise, even if the disc reports as empty.
Even a formatted hard drive could be reconstructed by someone who knows what they’re doing – and cybercriminals often know exactly what to look for on salvaged computers.
The only satisfactory way to ensure your online banking credentials and passport scans are permanently placed beyond their grasp is to fully erase a hard drive.
Erasing an HDD or SSD
If there are contents you want to salvage, drag and drop them onto an external media device like a USB stick, or run a backup-and-restore utility through the operating system.
You now have a choice between using the computer’s in-built factory reset utilities, or installing a specialist tool like DBAN, which works on both PC and Mac HDDs.
SSD drives can be erased using utilities like MHDD, KillDisk or CBL Data Shredder, and these programs will also work on HDDs.
These data destruction utilities are known variously as disc wipe software or hard drive erasers, and they repeatedly overwrite a hard drive’s contents until nothing is left.
Although the end results will be similar, each platform’s user interface varies widely in terms of simplicity.
The same is true for the pre-installed programs on your computer which can erase a hard drive.
For instance, Mac users should give themselves Root User privileges, insert the installation CD if one was provided, reboot the computer and then erase the default Mac HD volume.
Destroying an HDD
While formatting a hard drive is a perfectly satisfactory way of ensuring stored data is irrevocably erased, there is a nuclear option.
Specialist companies will destroy everything inside your hard drive casing, rendering its contents unsalvageable.
This often involves dedicated hardware like a degausser, which disrupts the magnetic domains on the hard drive until it’s only fit for landfill.
Alternatively, you could destroy it yourself, by removing the drive from the tower.
Open the computer’s casing and unclip or unscrew the hard drive – usually a black oblong measuring around 6” by 4”.
Its spinning discs are protected by a robust plastic case, which needs to be taken apart.
These cases are typically held together with hexagonal screws, and any decent screwdriver kit ought to include a compatible head.
Remove the outer casing, and the hard disc (or discs) will be held in place by a combination of smaller screws and the spindle which reads their contents as they rotate.
Unscrew or prise the discs out, before cutting them in half with heavy-duty scissors or wire cutters.
Alternatively, you could give both sides of each disc a vigorous rub with coarse sandpaper, drill through it at random points or hammer nails into it.
Scratching the surface with a screwdriver or a sharp knife also works. A few deep gouges running across the diameter of the disc should ensure its contents will never be read.